Where fast shower promises can get risky
A fast shower installation is not automatically bad. Some insert, panel, or matched-system products can move quickly when the existing conditions are simple and the installer follows the product sequence.
The risk starts when a custom tiled shower is treated like a cosmetic swap. A tiled shower is not just tile on the wall. It is a layered water-management system with framing, backing, waterproofing, slope, drainage, seams, corners, valve openings, ceiling moisture, ventilation, tile layout, grout, sealant, and glass details all working together.
Before choosing a fast shower remodel, ask what system is being used, what needs to dry or cure, how the pan will be tested, and what happens if demolition reveals damage behind the old shower.
Tile and grout are not the waterproofing
Tile and grout are the visible finish. They are not the plan that protects the wall cavity, subfloor, framing, ceiling below, or nearby trim from water.
The homeowner should hear product names, membrane method, drain type, seam treatment, cure time, and test plan, not just a general promise that the shower will be waterproof.
The weak spots: corners, seams, curbs, niches, and drains
Flat wall areas are not the only concern. Showers usually fail first at inside corners, outside corners, board seams, curb transitions, niches, benches, valve openings, and the drain area.
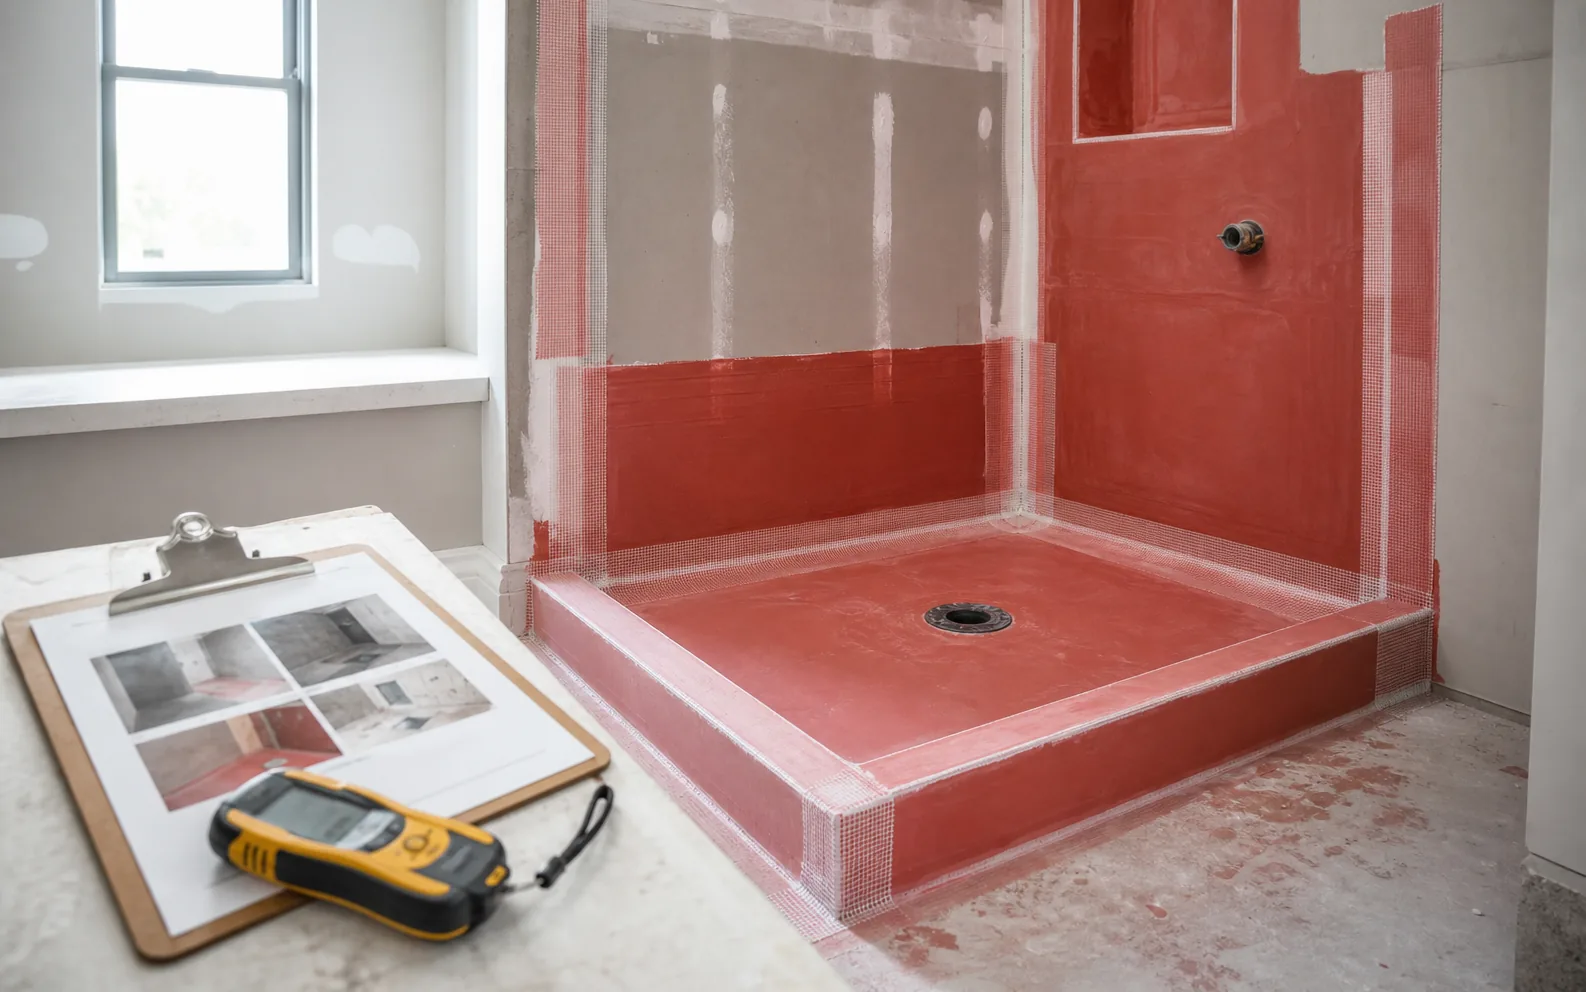
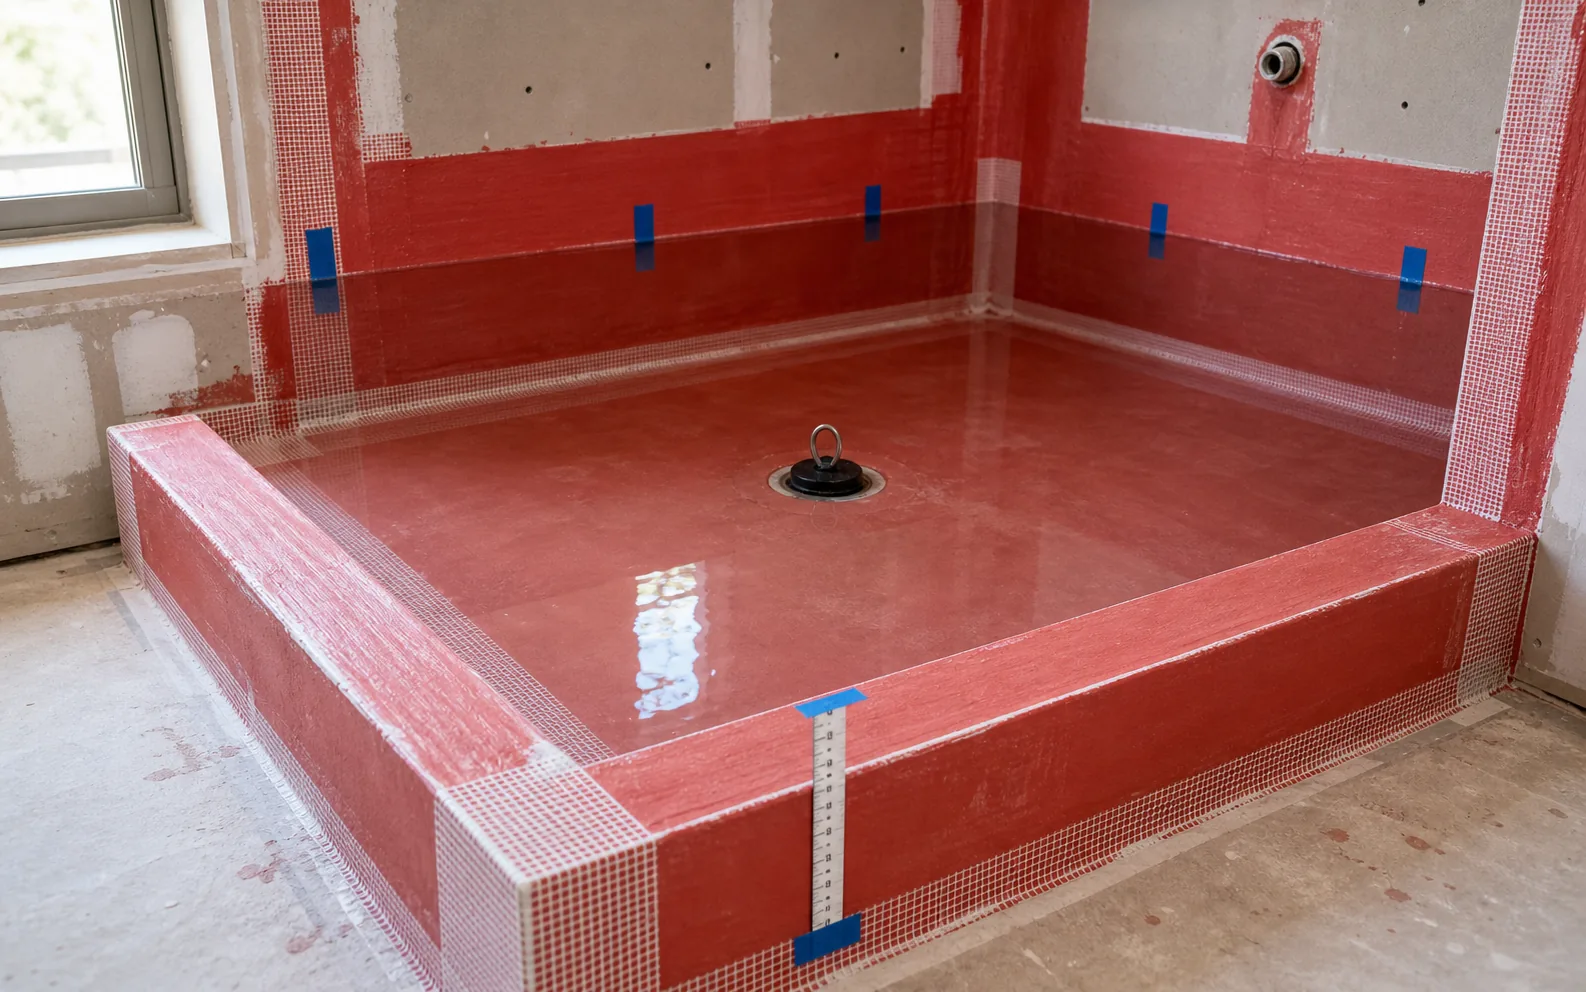
On EuroCraft shower work, edges and corners are reinforced before the surface is treated as finished. When the system calls for it, that can mean liquid waterproofing membranes like RedGard used with approved reinforcing mesh or fabric, built up in layers instead of brushed on once for show.
The point is not the color of the coating. The point is the full system: correct prep, correct mesh, correct overlap, correct thickness, enough drying time, and no skipped corners.
The shower pan should be checked before tile hides it
A shower pan should not just be trusted because someone said it is fine. It should be filled and observed before the tile goes in, when a leak can still be found and corrected without destroying finished work.
That testing time is not wasted time. It is the difference between confidence and guessing. Once tile, grout, trim, glass, and caulk are installed, every hidden mistake becomes more expensive to diagnose.
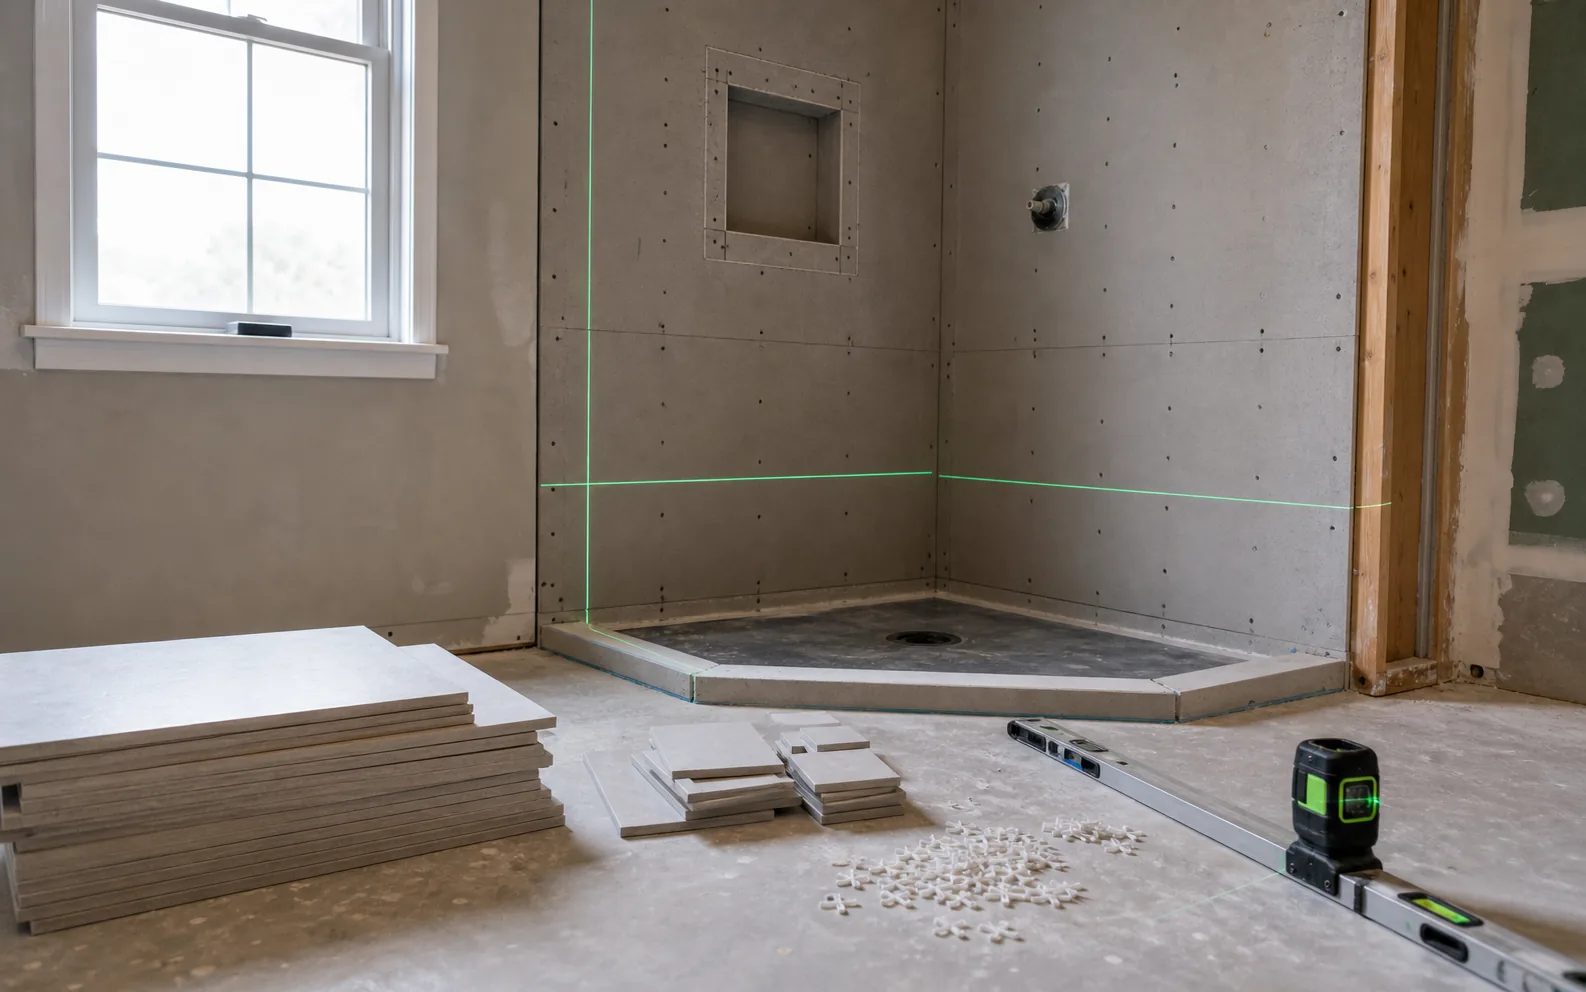
Walls, floors, and ceilings need prep before finish work
A good tile job starts before tile. The wall plane should be checked so bowed studs can be shaved, low areas can be shimmed, and cement board or fiber-cement layers can create a flatter, more square surface.
The floor matters too. A shower can only be as solid as the base under it. If old water damage has softened the subfloor or weakened the drain area, the floor may need repair or reframing before the pan is built.
The ceiling above the shower also needs attention. Splash and steam can attack paint, drywall joints, and weak ventilation. Treating the ceiling and fan path as part of the wet-room discussion helps prevent peeling and moisture complaints later.
When fast shower systems can make sense
Modern shower systems can reduce time compared with older methods. Foam pans, sheet membranes, preformed niches, inserts, panels, and matched drains can help when installed correctly and used in the right conditions.
Fast is not the problem by itself. The problem is using speed as a reason to skip substrate prep, reinforcement, dry time, drain detailing, wall correction, or testing. A fast product installed outside its instructions is still a risky shower.
Questions to ask before hiring for a shower remodel
- What waterproofing system will be used?
- What manufacturer drying or cure times apply?
- How will corners, seams, niches, curbs, and drains be reinforced?
- Will the shower pan be tested before tile is installed?
- What happens if demolition reveals water damage, bowed framing, old plumbing, or soft subfloor areas?
- How will the walls be made flat, square, and plumb before tile?
- How will the ceiling and ventilation be handled?
- How will tile layout avoid tiny cuts in obvious sight lines?
- How will glass, trim, caulk, and transitions be planned?
- What exclusions or change-order rules apply if hidden damage is found?
Photos to send before a shower remodel
Good photos help turn a vague shower idea into a real scope conversation.
- The full shower from outside
- The drain area
- The valve wall
- Inside corners
- Curb or tub edge
- Ceiling above the shower
- Bathroom fan or vent location
- Cracked grout, stains, peeling paint, soft drywall, or swollen trim
- The wall outside the shower
- Any ceiling below the bathroom if there has been a leak
Related next steps
Checklist
- Ask what waterproofing system will be used
- Ask for the manufacturer drying and cure times
- Ask how edges, corners, seams, niches, and curbs will be reinforced
- Confirm liquid membrane and mesh are approved for the chosen system
- Treat the shower ceiling for splash, steam, and peeling risk
- Confirm walls will be made flat, square, and plumb before tile
- Plan finished tile thickness against the surrounding wall surface
- Check tub lip clearance and caulk joint size on bathtub surrounds
- Make sure tiled walls are stiff enough before finish tile goes on
- Check whether damaged floor framing or subfloor needs repair
- Confirm how seams, corners, niches, curbs, and drains will be waterproofed
- Ask whether the pan will be flood tested before tile
- Review the tile layout before installation starts
- Avoid tiny cut pieces in obvious sight lines
- Do not cover wet materials before they are ready
- Get waterproofing exclusions and change orders in writing
Related project
Primary Bath Shower Conversion
See how shower scope clarity, waterproofing planning, and finish details show up in actual bathroom work.